Saturday, February 9, 2019

Goose themed 3D scene

Sometime at the end of 2018 I made the decision to re-focus my personal learning as a Graphic designer on Photo realistic image generation using Blender as a tool. The following images represent an effort to make Photo realism a reality.

Shooting for the Moon

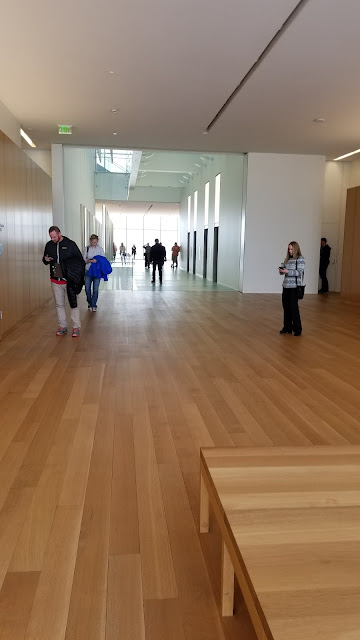
Below is a Photo I took at my parents house a while ago. I really like the light, and the Porcelain Geese inspired me to make the 3D image a Goose-themed one. Additionally it is simple to compose. As a beginner I knew I could easily model this, and the real challenge would be in generating effective textures and lighting. I will say from the outset, I have only partially achieved what I set out to do. I still have much to learn. The quote by Norman Vincent Peale comes to mind;“Shoot for the moon. Even if you miss, you'll land among the stars.” I very much hope to land among the stars in this endeavor.


Modeling and first steps

I began by modeling the Window Frame, seeking at first, to copy the texture and shapes of the frame in the source image. Then I decided I didn't like how plain the sliding widow was. Decided to do something a little more decorative. Should be noted that it was also about this time I decided to do a Goose-themed setting.


Saturday, July 28, 2018

Family history book project

Earlier this year I agreed to help a colleague design and layout two family history book. I wanted the experience of laying out a book so I took on the project. What an experience it was! multiple hours were required to to accomplish the task put to me. But I enjoyed it and loved learning some new things about book publication.

Organization is key

One of the foremost things I learned is that both you and the client need to be organized for the layout to go smoothly. Key to this is clear precise communication of what is expected. Both you and the client need to develop a vision of what the end project is to be. Obviously this will change as the production progresses. The client gave me a huge amount of artistic freedom. But when it came to the structure of each section and chapter he knew, for the most part, what he wanted. I was lucky enough to have a client who organized photos into folders based on each section of the book. He also created a word doc with an outline of where information and photos would go in the book. Without these key items of organization I would have had to bother the client over and over for where thing were to go. This would have been a huge time-waster

Use professional software and know the tools

Another set of skill I learned revolved around my use of InDesign. This is Adobe's professional program for laying out multi-page documents. When it comes to dynamic layouts and massive page counts this is the program to use. The tools and ease of use are top notch. I had to learn how to create sections for this particular project.

Samples

Below are a few sample pages of one of the books I laid out. If you would like to see the complete book go to this link to view the PDF.


Tuesday, March 13, 2018

Jury duty and a few photos

WARNING: The following contains some talk of sexual activities. Parents probably shouldn't let kids read this unless they feel they can handle it.

NOTE: The following is my opinion of the events that took place during a civil case of D. C. vs. Jennifer Hasratian and El Matador March 5-13, 2018. Take if for what its worth


Common area just outside the court room


Common area just outside the court room. None of the people in this Photo were selected


Common area just outside the court room
Exterior of courthouse in Salt Lake City Ut


On March 5-13, 2018 I served on a Jury of the United States District Court for the District of Utah. This turned out to be a unique journey full of grueling testimonies, antics from the defense and Plaintiff lawyers, tons of evidence, and serving with amazing jurors.

On March 5 we entered the antiseptic halls of the new District court house on 351 South West Temple at 7:30 am. Security is similar to the airport, minus the full body scanners. Found out I had to remove my belt. Ended up not wearing a belt the remainder of my days in attendance at the courthouse.


The Selection

Pathway on East side of courthouse in SLC
Once in we went to a room full of chairs with a projector and screen. After all 44 of us arrived we watched a video which appeared to be at least 15 years old, based on the type of computers shown. This was essentially a propaganda video on how we were all performing our civic duty and upholding the freedoms of our country by adhering to the order to show up. I am happy to report that after serving, I found the video to be essentially true. After serving, I have definitely come away with a deeper sense of how our system works, and what a privilege it is to live in a country that affords its citizens a trial to prove innocence or guilt, and to settle disputes. Boy, let me tell you, did we have a dispute to settle last week.


Selection took the better half of a day. We were questioned as a group. There were many with legitimate excuses. Other s not so much. After this they pulled us in one by one to question us. It wasnt until the 3rd day of my service I realized why they asked me what they asked. Based on my answers I realized why I was chosen; I cant go into detail due to the sensitive nature of some of my answers. Suffice to say, part of the reason I may have been chosen was because they saw I might empathize with the defendant and Plaintiff on some level.

So I was #8, and had to wait through the remaining potential jurors questioning. We were afforded some breaks during this time, so I ate lunch and walked around a bit. They told us if they selected someone with a higher number than what we were, we could go home. They selected one person lower than myself, then called #9. Yes!, going home. Nope. "Wait #8, we made a mistake. You've been chosen." Honestly I was curious as to what it would be like to serve on a jury, so I wasn't terribly disappointed.

After selections were made we were given new numbers. I ended up being Juror #2. this was also the order we sat in two rows in the courtroom.

What we had to accomplish

Once all other potentials were dismissed the Judge laid out what had already been proven in the criminal case. This was to be a civil case, in which we were were to determine compensation for damages, if any, based on what had been proven in the criminal case and additional evidence presented to us.

This is what happened: In May 2013 a 16 year old teen (D.C.) was hired by one of the owners (Jen) of El Matador in Ogden. Shortly after being hired they began having sex. This continued until July of the same year. The police found out, the relationship ended, Jen was accused. I still dont know the details of the criminal case beyond what the Judge told us last week. Maybe I will look it up some time. What I do know is that some time in the following couple years Jen was convicted, sentenced and fulfilled her sentence. That brings us to the Civil case that I and 11 other jurors were now a part of.

That first day there was only time for opening statements by the Plaintiff and Defense lawyers. Jen was present, but D.C. was not. This would be the norm except for two days in which D.C. would testify.


Four and a half days of gueling testimony and evidence

Trax station near Decker Lake in WVC, on last day of deliberation.
Rode Trax every morning
I wont bore you with every detail of this case. What took place over the next four and half days was a ton of testimony from witnesses, evidence presented and free lunches. I will share some of the more interesting or disturbing things here.

"I object"

Lets start with the Plaintiff Lawyer. Not sure if he was new to the whole Jury trial thing or not, but he kept on leading his witnesses. The defense lawyer over and over and over, "Ojection, leeeeading the witness." She got pretty snarky about this, and the judge got pretty exasperated. I think he figured it out by the third day, after we had gone through this same scenario about 70 times.

Repeat, repeat, repeat, repeat, repeat, repeat, repeat, repeat, repeat, repeat, repeat, repeat

So, so many things were repeated. Some of the items were just simple evidence we were already aware of. Other things were quite disgusting. Such as the defense lawyer reiterating 3 or 4 times specific sexual acts that I will not repeat here.  I suppose this kind of repetitive language was for our benefit supposedly. Repetition breeds remembrance. This caused me to feel dark and worn down inside by the end of each day. It all weighed on my soul, that such despicable things could be done by people.

Saturday, February 3, 2018

Effective cutouts using Photoshop

Hello!
The following tutorial should help anyone looking to improve their ability to cut out images in photoshop. Having worked as a graphic designer and layout artist for over 10 years now, I have seen every level of cutout from crappy rough edges to the superbly flawless. When done right, and incorporated into a composition thoughtfully, cutouts can add pop and interest to final imagery.

Images to cut

I will be using the following 2 examples. The one on the left represents the minority of all photos that most designers will work with. It is high contrast and therefore very easy to work with and cut out. It is the type of image we all wish we could work with all the time.

The second image represents the majority of images that, in reality, we will work with most of the time. This would be considered more difficult and requires a bit more patience and skill to cut out.
Photo on left from Shutterstock.com. Photo on right from Deseret News by Jeffrey D. Allred.

Using the 'Select and Mask...' option

Lets get started with the easy photo of the Mom and girl. After opening activate the lasso (L) tool in the tools palette. Once selected the 'Select and Mask...' option will show up in the options bar at the top of the screen.

Select and mask interface

Once you click on 'Select and mask...' a new interface will fill your screen. This work space' sole purpose is to help you make the best selection for your image, as quickly as possible.


Saturday, January 20, 2018

Photo realistic 3D renderings progression

I've been interested in 3D for a while. Decided I wanted to take things to a new level with an attempt at creating photo realistic imagery using Blender. In this post I show off some of my first attempts in this field.


What to use as a project?

Decided I needed to create an environment in which to practice. I had already created some models of chess pieces I hope to get 3D printed into a full-blown chess set. The thought crossed my mind that I could model a chess board in Blender, and place what pieces I have created on the board. Figured this would be something interesting to show off as well.


Resources

I searched around on Youtube and came across a channel called Blender Guru. This guy has all kinds of vids on 3D creation, in particular using Blender as the primary tool. He constantly plugs his own web site, which has a decent amount of free resources for texturing and backgrounds. So, all of the texturing you see in the images in this post come from this guys web site which is https://www.poliigon.com/. Without his generous sharing of resources and information none of these images would be possible. I hope in the future to create my own textures and back grounds for objects and settings.

The images

Below are some of the more successful renderings that have resulted from educating myself on using Photo realistic materials and textures.

Objects

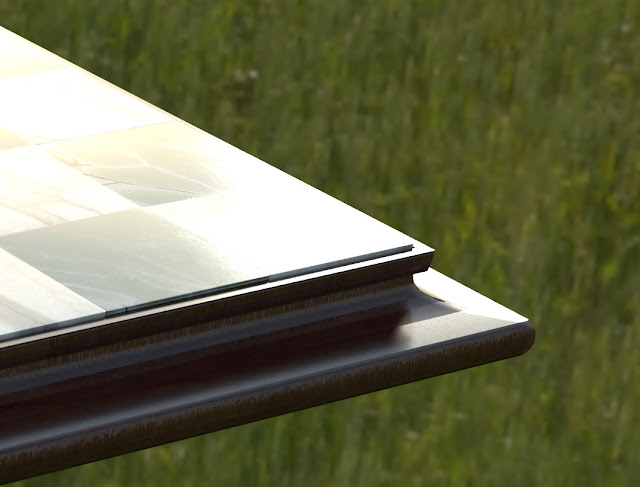
I used a marble texture on the board squares, Fine dark wood for the edge of the board. On the pieces themselves I am using a tile texture that would normally go on a pathway on the floor in a home. But for purposes of learning how to texture objects i think they work pretty good on the pieces. I am using the same texture on the pillar holding the board up.

Background

For the background I am using a 360 degree VR high dynamic range photo provided by Poliigon.com. This definitely ads serenity to the scene. It also simplifies things a bit, because the sun is the single source of light in the image.


What I learned from this: Imperfection is the goal

It is so easy to make things look perfect in a 3D environment. The human eye is very hard to trick. In order to push realism in Photo realistic imagery it is necessary to tweek edges and serfaces in such a way that they look like they have been created by human hands. With these images that is a mixed bag. On the joints of the board, I did a decent job of this. However, the corner edges going along the board are too straight to be considered realistic. So there is much I would have to do to push the realism even more. All things considered, this is not a bad first attempt.


Monday, December 11, 2017

Christmas Card 2017

3D rendering of the card


Hello everyone! Merry Christmas. I decided to create a Christmas Card that I ended up printing and also used as a digital card.

The sketch

Out of the recesses of my mind I sketched then scanned the below drawing into the computer.

Colorizing in Gimp

In Gimp 2.8 I created a gradated texture surrounding the figures. I did this by creating a circular gradient, Cubism filter, emboss, and changing the layer mode to Grain Extract. Then on another layer I painted the figures, achieving what you see below

Laid out in InDesign

I finished laying this out in InDesign. On the cover I placed my image with some text at the top. Inside I found some text in the Holy Bible and used a version of the figures without the textured background.

Front of card

Inside of card

Friday, December 1, 2017

Graphics in Review, Nov. 2017

Another rip-roaring month at the Deseret News. Below is my contribution, with the first 10 or so being my top picks.

American Family Survey graphics

I did a number of graphics for a series of stories that ran in the Deseret News. Below is the massive graphic I did for online. Here is a link to its location on the landing page for this series.