The following tutorial should help anyone looking to improve their ability to cut out images in photoshop. Having worked as a graphic designer and layout artist for over 10 years now, I have seen every level of cutout from crappy rough edges to the superbly flawless. When done right, and incorporated into a composition thoughtfully, cutouts can add pop and interest to final imagery.
Images to cut
I will be using the following 2 examples. The one on the left represents the minority of all photos that most designers will work with. It is high contrast and therefore very easy to work with and cut out. It is the type of image we all wish we could work with all the time.The second image represents the majority of images that, in reality, we will work with most of the time. This would be considered more difficult and requires a bit more patience and skill to cut out.
 |
| Photo on left from Shutterstock.com. Photo on right from Deseret News by Jeffrey D. Allred. |
Using the 'Select and Mask...' option
Lets get started with the easy photo of the Mom and girl. After opening activate the lasso (L) tool in the tools palette. Once selected the 'Select and Mask...' option will show up in the options bar at the top of the screen.Select and mask interface
Once you click on 'Select and mask...' a new interface will fill your screen. This work space' sole purpose is to help you make the best selection for your image, as quickly as possible.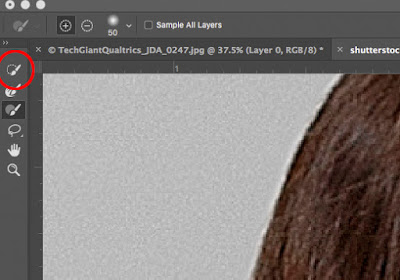 Start your selection by activating the Quick selection Brush tool (W) in the top left in the tools palette. After this, start clicking or click+drag the gray areas in the image. right away you will begin to see why contrast of colors is so important using this method. You will notice that the tool has a hard time at the base of the girls skirt because the colors are too similar.
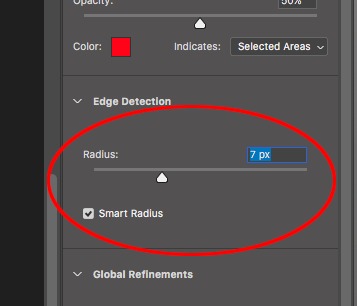 Once you've completed selecting all the gray areas, adjust the options on the right by increasing the radius and activating the 'Smart Radius' option. This will allow the Refine Edge Brush tool to be more dynamic.
 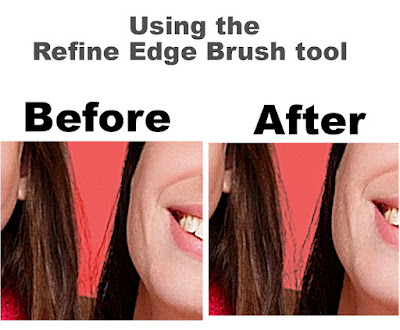 Now activate that tool and go along edges where the Quick selection brush tool just couldn't differentiate. This is usually around wispy hair or other hairyish type objects. This step will require you to zoom in closer so you can see and select smaller details. Additionally you will need to use the Left and right brackets to control the size of your brush tip for all of these tool.
Once you've completed this, use the Brush tool (Third tool down) to go in and refine even more. The base of the girls skirt, for example, needed this tool because the preveous tools just couldnt differentiate between the background and the skirt. When I finished this, below is what I ended up with.
Every thing in red is what you are telling the computer to mask out. Make sure the 'Output to:' Option is changed to 'Layer Mask'. Click Okay. Below is what I ended up with:
Below are some detailed screen grabs of some of the more difficult areas so you have an idea of how amazing Select and Mask really is.
The difficult image to cut
Now its time to separate the children from the adults. If you are ready to do a cutout for an image that doesn't have a high contrast background, do continue.
Polygon lasso tool
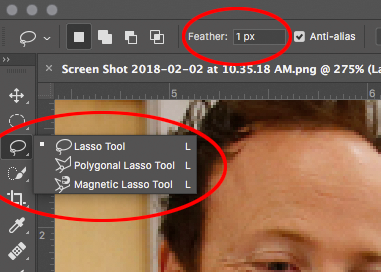 Activate the polygon lasso tool. If you cant see it, simply right click on the lasso tool. A drop down will appear, and you can select the Polygon lasso tool.
Also be sure the feather setting is set to 1 pixel before you begin your selection. This will add a slight feather to your cutout, so there is no rough edges.
Make the cut
Now put on your patience hat, and focus your eyes and hand movements like a laser beam. Begin by by clicking, moving your cursor to the next position, and click again. Do this over and over, moving along the edge of the figures, until you've formed a loop, completing the selection. If you mess up you can fix the selection after completing the loop.
Lets say you want to use the lasso tool to make a nice curve, This is what I did on collar of the shirt, seen below. Simply hold down the Alt/option key then click and drag a line in the exact shape you need it to be. Then when you want to revert to the polygon selection tool, let off the Alt/option button and go back to clicking. I explain this method, because using these two tools in tandem streamlines the manual cutout process for me. Makes it a bit quicker and more exact. With practice you will come to see what I mean.Frizzy hair
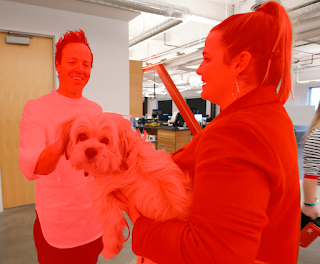 When you get to a place where there is frizzy hair, similar to the man in this photo I usually take some time to be generally accurate but not exact. We'll get back to this later. When you finish the selection loop Activate the 'Select and mask...' option.
 Activate the Smart radius in the Edge detection section of the options palette and increase the radius. Then using the Refine Edge Brush tool click and drag over the man's spikey hair. This is what I ended up with below. Obviously this works in this case because of the contrast between his hair and the background. When finished make sure the 'Output to:' option is set to 'Layer mask'. Then click the 'OK' button.
Clean up
Now Zoom in on your cutout with a smallish feathered brush tip. Making sure your in the layer mask mode in the layers palette, paint in (White) and out (Black) anything along the edges that seems amiss. You will need to zoom in and out (alt/option+mouse scroll wheel) Below you will see a before and after of one part I needed to clean up on the lady's chin.
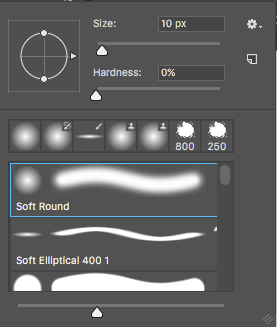 I use a larger feathered brush when I need a larger gradation between what is Opaque and transparent. This can be handy especially when hair needs to be softened. Below is the final cutout.
Conclusion
This image took about 10 minutes to cut out. Depending on the complexity, that time goes up or down. with practice, and patience anyone, using a regular mouse can create outstanding cutouts, for use in a great many applications.


No comments:
Post a Comment